| Error Code | Description | Symptoms | How to fix |
| 1-1 3-5 4-6 | Safety sensors are blocked, not aligned or wire problems | Garage starts to close but reverses to the open position | Align the sensors and make sure that are no objects between them. Check if the sensors are connected to the opener, and if the wires are in a good condition |
| 1-2 | Safety sensors are shorted or reversed | Opener will not close and the lights will flash ten times | Ensure the safety sensors are correctly wired and the bare cooper is not touching |
| 1-3 | Short in the wires connecting with the wall button | It works with remote control and keypad but not with the wall control panel | Hire a technician able to do the wiring properly |
| 1-5 | No movement in the opener | Garage door opener does not move | Hire a technician to check the hardware |
| 1-6 | Unexpectedly move downward or dropping | After reaching the opener position, the motor turns off and the door moves down | Check the sensors, and the hardware |
| 2-1 2-2 2-3 2-4 2-5 | Problem with the logic board | The garage door opener is not functioning as expected due to a failure in the logic board component | Unplug the opener from the power source, wait for 10 seconds, and plug it back in. Now, try to use it again. If you need to replace the logic board, check this video |
| 3-2 4-3 4-4 | Opener has lost power | No lights in the opener head | Check the power connection with the opener or the backup batteries if your opener has it |
| 3-3 | Logic board needs replacement | The garage door is not functioning as expected | Unplug the garage door opener from the power source, wait 10 seconds, then plug it back in. Now, try to open or close the garage door. If the problem persists, the logic board must be replaced |
| 4-1 4-2 | Excessive force. The opener is using too much force when closing the door | The door reverses and returns to the open position before touching the floor | It is very likely that is a garage door hardware component damaged that needs to be accessed by a professional technician |
| 4-5 | Unrecognized travel module | Reverse the open position. The garage door opener does not move and remains in an open position | Ensure the correct travel module is installed |
| 5 Up – 5 Down | Opener receives an unattended open or close command and myQ Work Light is not installed/programmed. | The garage door does not move, remains at open or close position | Install and program the remote light to the garage door opener |
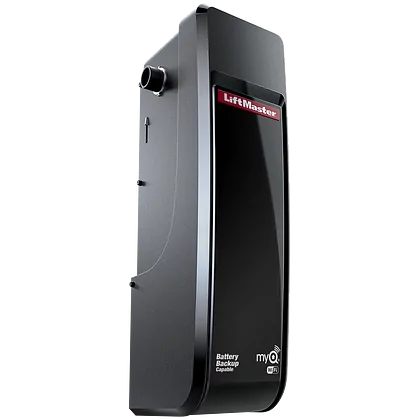
Liftmaster LJ8900W Specs, Benefits and Manual
Liftmaster LJ8900W is a great model that provides reliable and smooth operation for customers. The motor comes with safety sensors and other features. The model features:
Light-Duty Commercial Door Operator for Sectional Doors
- Wallmount with smaller, lighter sectional doors with light-duty cycle requirements.
- Rated Duty Cycle: Maximum 10 cycles per hour; Fewer than 25 cycles per day.
- Wall mount on small sectional doors.
- Easily connect the operator to the facility’s network with built-in Wi-Fi®.
Why choose a side-mounted garage door opener
A side-mounted garage door opener, also known as a jackshaft opener, is an excellent choice for homeowners seeking a quieter, space-saving, and modern solution. Unlike traditional ceiling-mounted openers, it installs on the wall beside the garage door, freeing up ceiling space for storage or lighting. It’s ideal for garages with high or obstructed ceilings. These openers operate more quietly and smoothly, reducing vibration and noise. Most models come with advanced features like smartphone control, battery backup, and improved security. If you’re looking for a sleek, efficient, and low-maintenance system, a side-mounted opener is a smart investment for your garage.
How to program travel limits on Liftmaster LJ8900W garage door opener
You can check through the manual on liftmaster website.
Setting travel limits on your Liftmaster garage door opener ensures safe and efficient functionality. Here’s how to do it:
1. Locate the travel limit dials on the side or rear flap of the motor unit.
2. Begin with the door closed. Press and hold the ‘Up’ button until the door reaches the desired open position, then release.
3. After the desired position, press the black button to set the limit and start the down position.
4. Next, press and hold the ‘Down’ button until the door reaches the desired closed position, then release.
5. Press the black button to set the limit. In the new models, just wait until you hear 10 clicks and the door will open and close automatically to set the force. Make sure that nothing passes through the sensors during the force learning phase.
6. Test the door to ensure it opens and closes correctly.
If you face issues, check for obstructions, ensure sensors are aligned, and confirm the motor functions correctly. For persistent problems, consult the user manual or contact Liftmaster support. Properly programmed travel limits help maintain the safe and efficient operation of your garage door opener.

Why Liftmaster
When it comes to performance, reliability, and innovation, LiftMaster leads the industry in garage door openers. Their products offer seamless integration with smart home systems, ultra-quiet operation, and superior security features like real-time alerts and secure remote access. Trusted by professionals across North America, LiftMaster openers are engineered for long-term durability and smooth daily use. Whether you’re upgrading for convenience or peace of mind, LiftMaster is the professional’s choice for dependable garage access solutions. Choose LiftMaster—where technology meets performance.
If you need more information on LiftMaster garage door opener troubleshooting, check our blog or contact Motion Garage Doors at (437) 873-1407.


